The rubber belts inside vintage cassette players, such as the FX281, are known to deteriorate with age, becoming gooey and preventing the reels from turning. If you’ve recently picked one of these up, stuck in a cassette, and realized it’s not working, the usual suspect is a worn belt. While it isn’t necessarily a difficult repair, it can take some time to complete, especially if the belt has melted into the gears’ grooves. Cleaning them out can be the longest part of this process, but it will be worth it to revive your device!
Many portable cassette players have similar internal mechanisms, so this can serve as a general guide to other (even non-Sony) devices. The WM-FX281, however, holds the spotlight here due to a lack of tutorials for this specific model online. This is intended to clarify any confusion that might arise during the FX281’s repair.
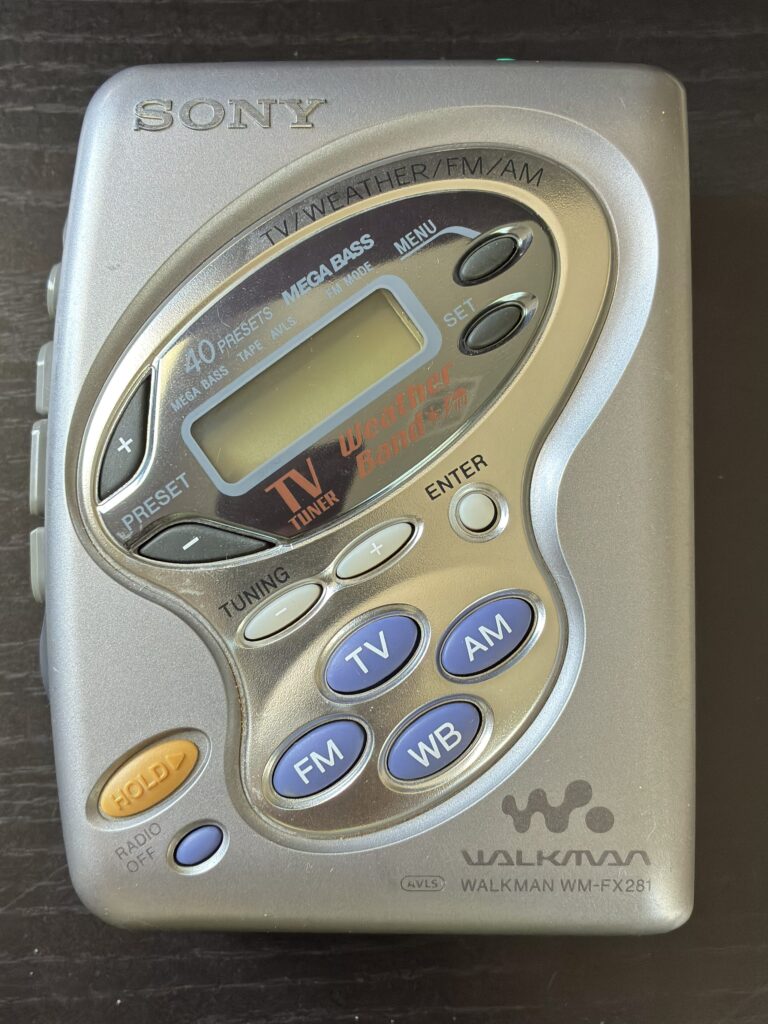
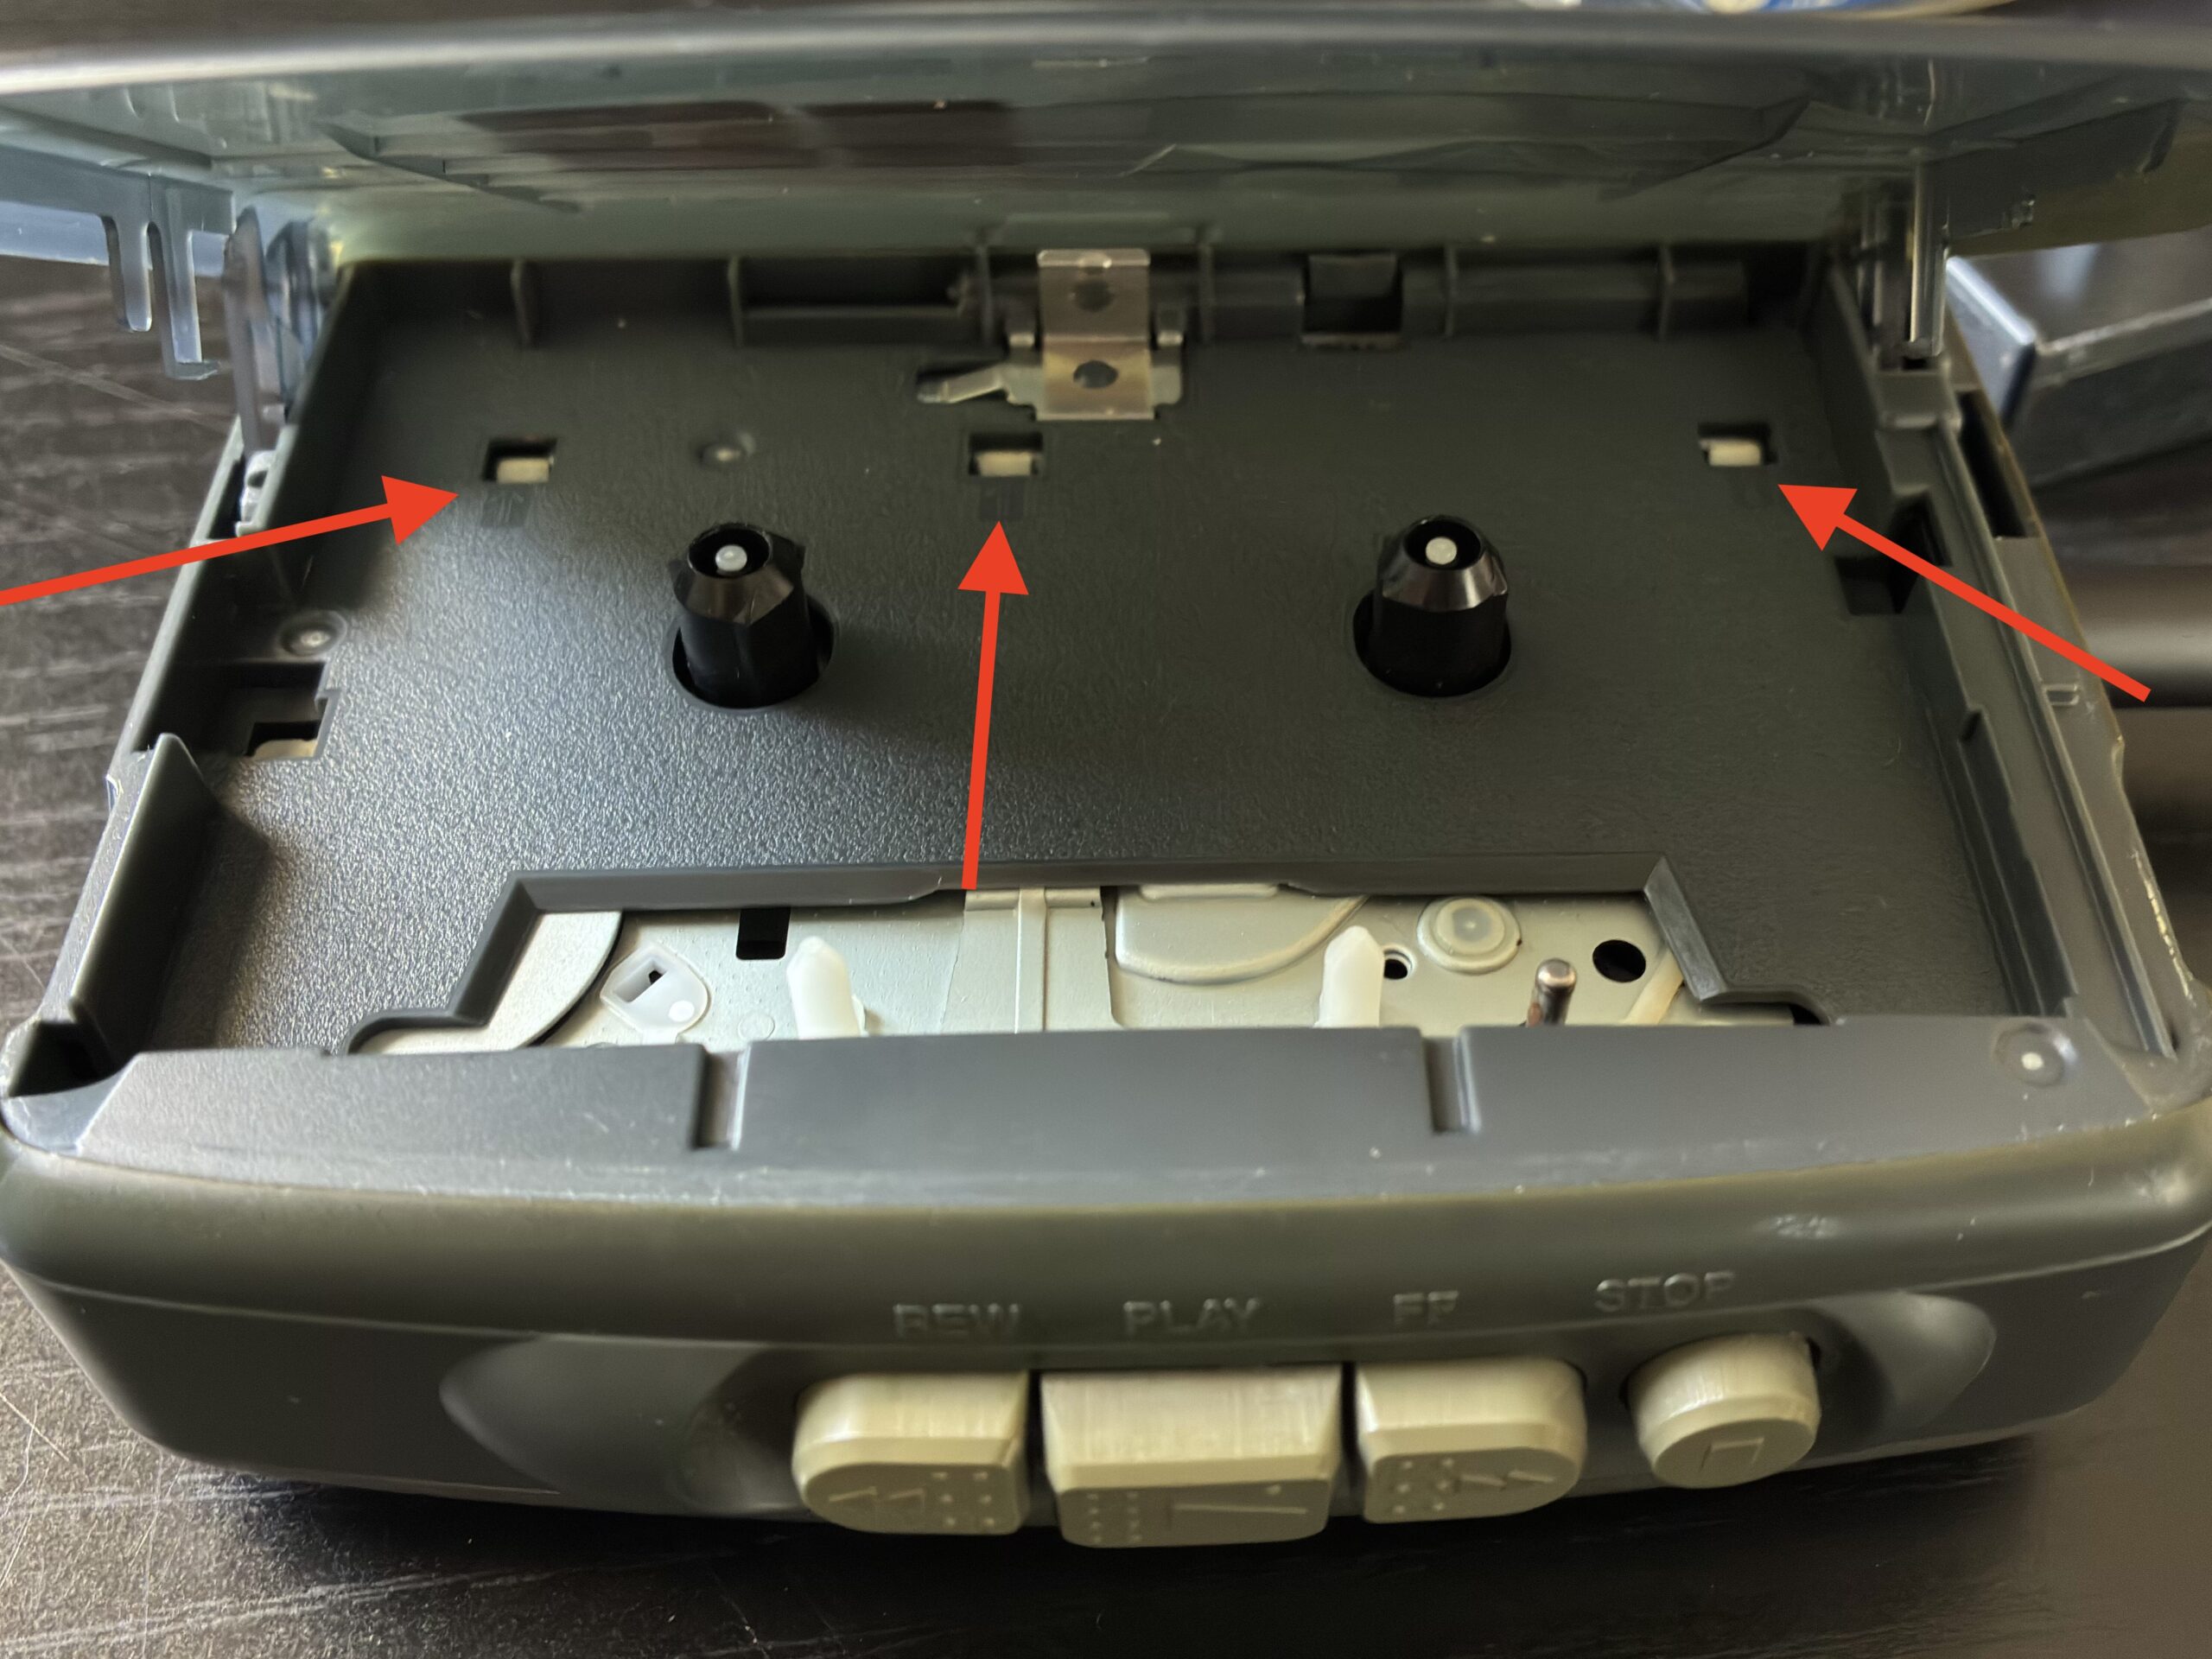
Outer Shell
- Open the cassette deck and locate the three tabs seated near the back. These must be pushed forward and unclamped with a thin, sturdy instrument, such as a metal spudger. (Note: these tabs may slowly return to their original positions. A few attempts at bending them may be necessary.)
- Once the tabs are sufficiently bent, a pry tool can be used along the seam that runs above the PLAY button in Figure 1. If there is any resistance when opening the shell, check the tabs from the previous step to ensure they have not returned to their original positions. (Caution: some internal clips may break when prying the player open. To minimize damage, run the pry tool around the entire device before opening.)
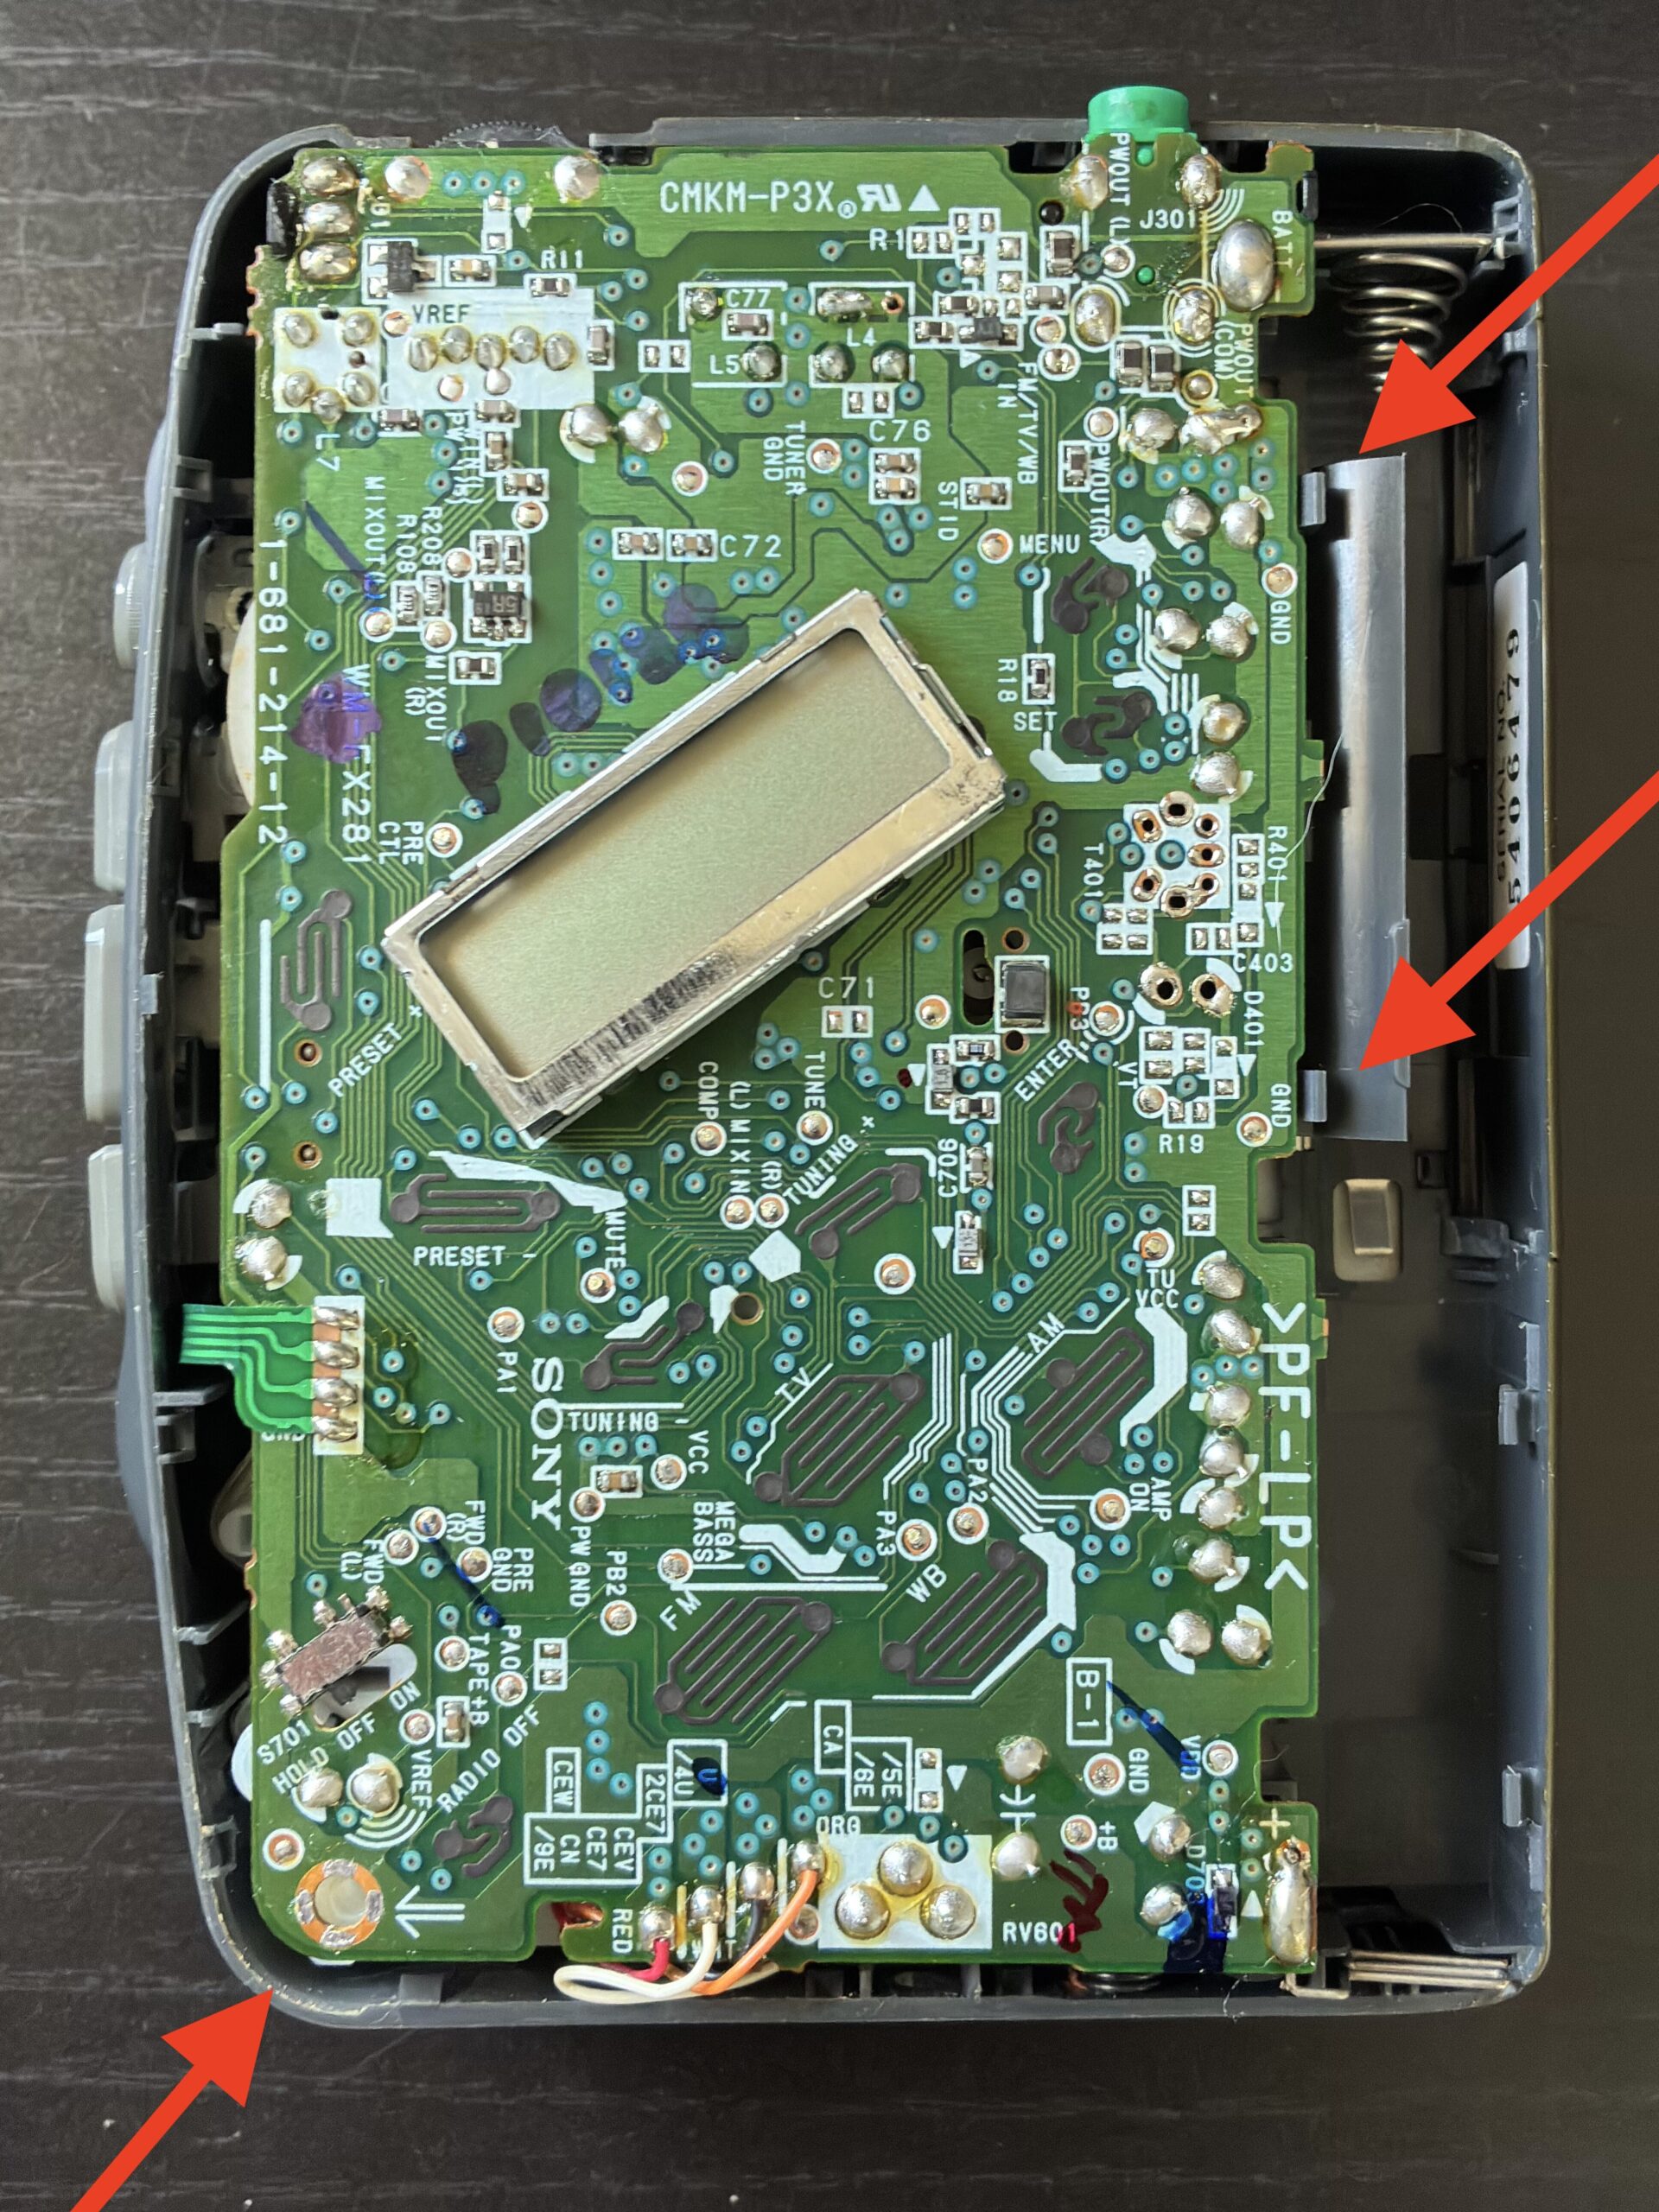
Moving the Motherboard
- Once inside the player, one screw will need to be removed (a #000 screwdriver will work here). It will be marked by a white arrow on the bottom left of the device.
- After removing the screw, detach the two black clips.
- The motherboard should come out of its housing, but do NOT remove it entirely. The green ribbon on the left and the (white, red, and orange) cables on the bottom will still be attached. Aggressive movements can damage these components.
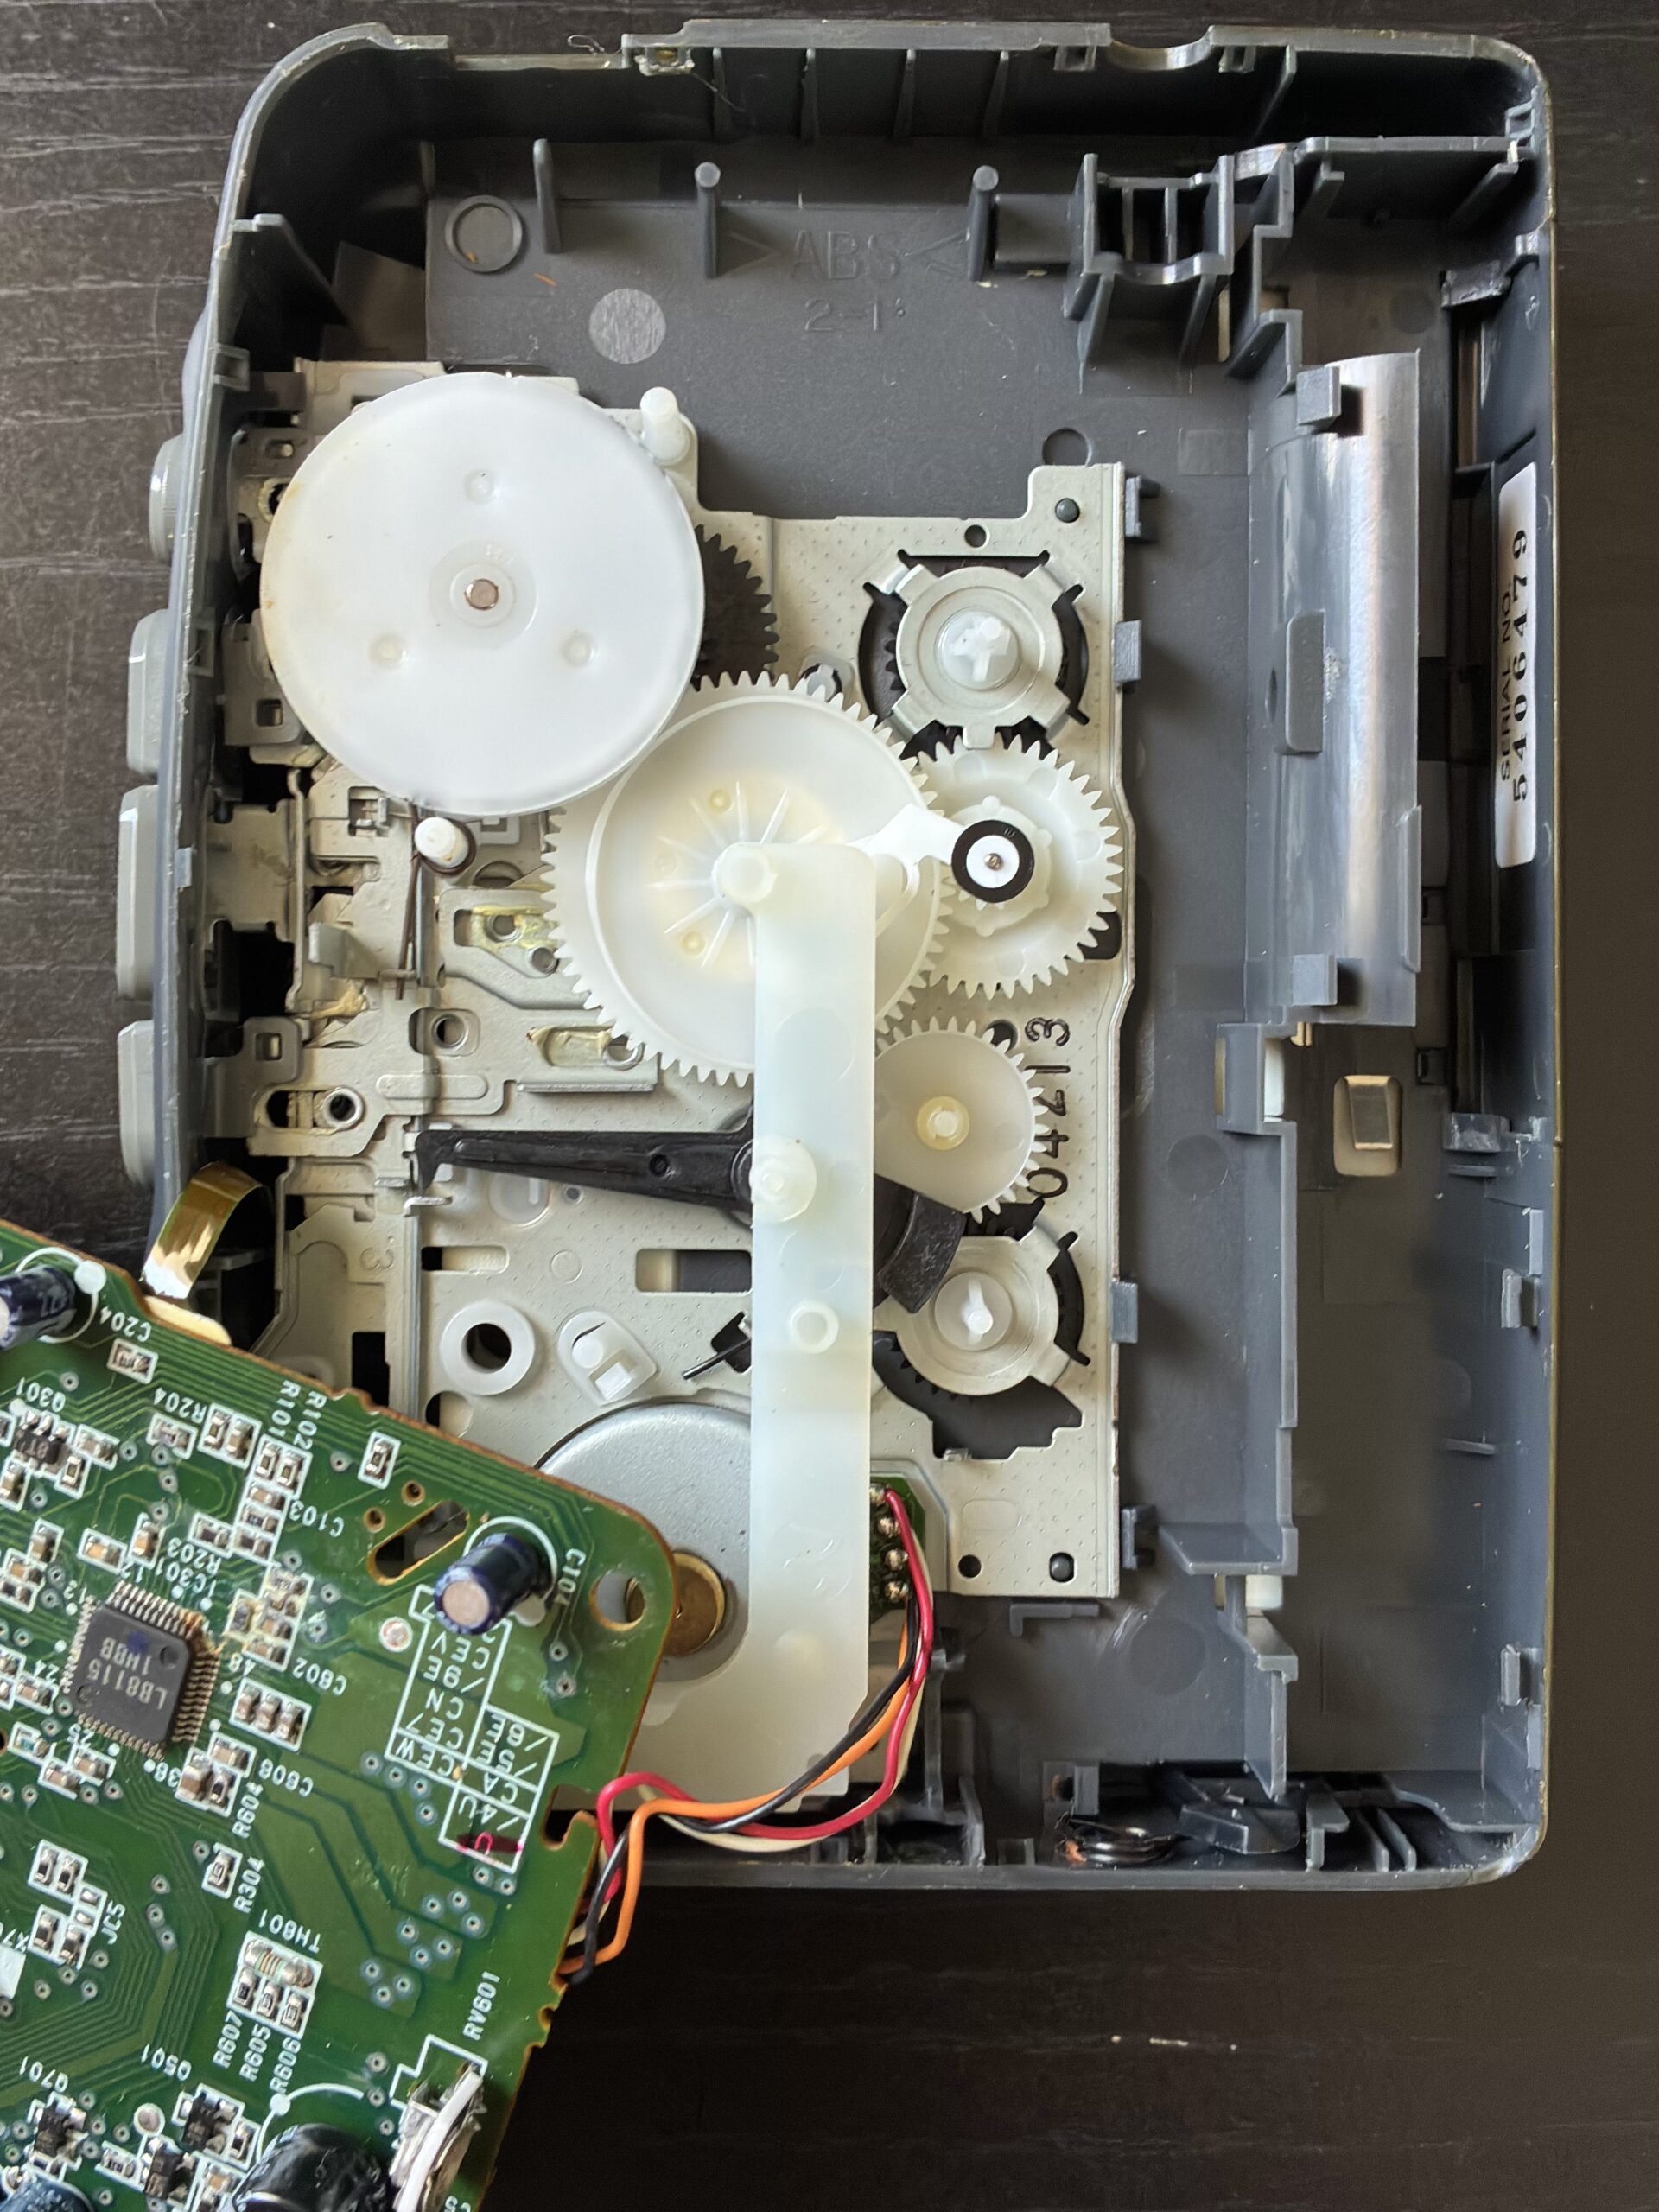
Cleaning the Gears
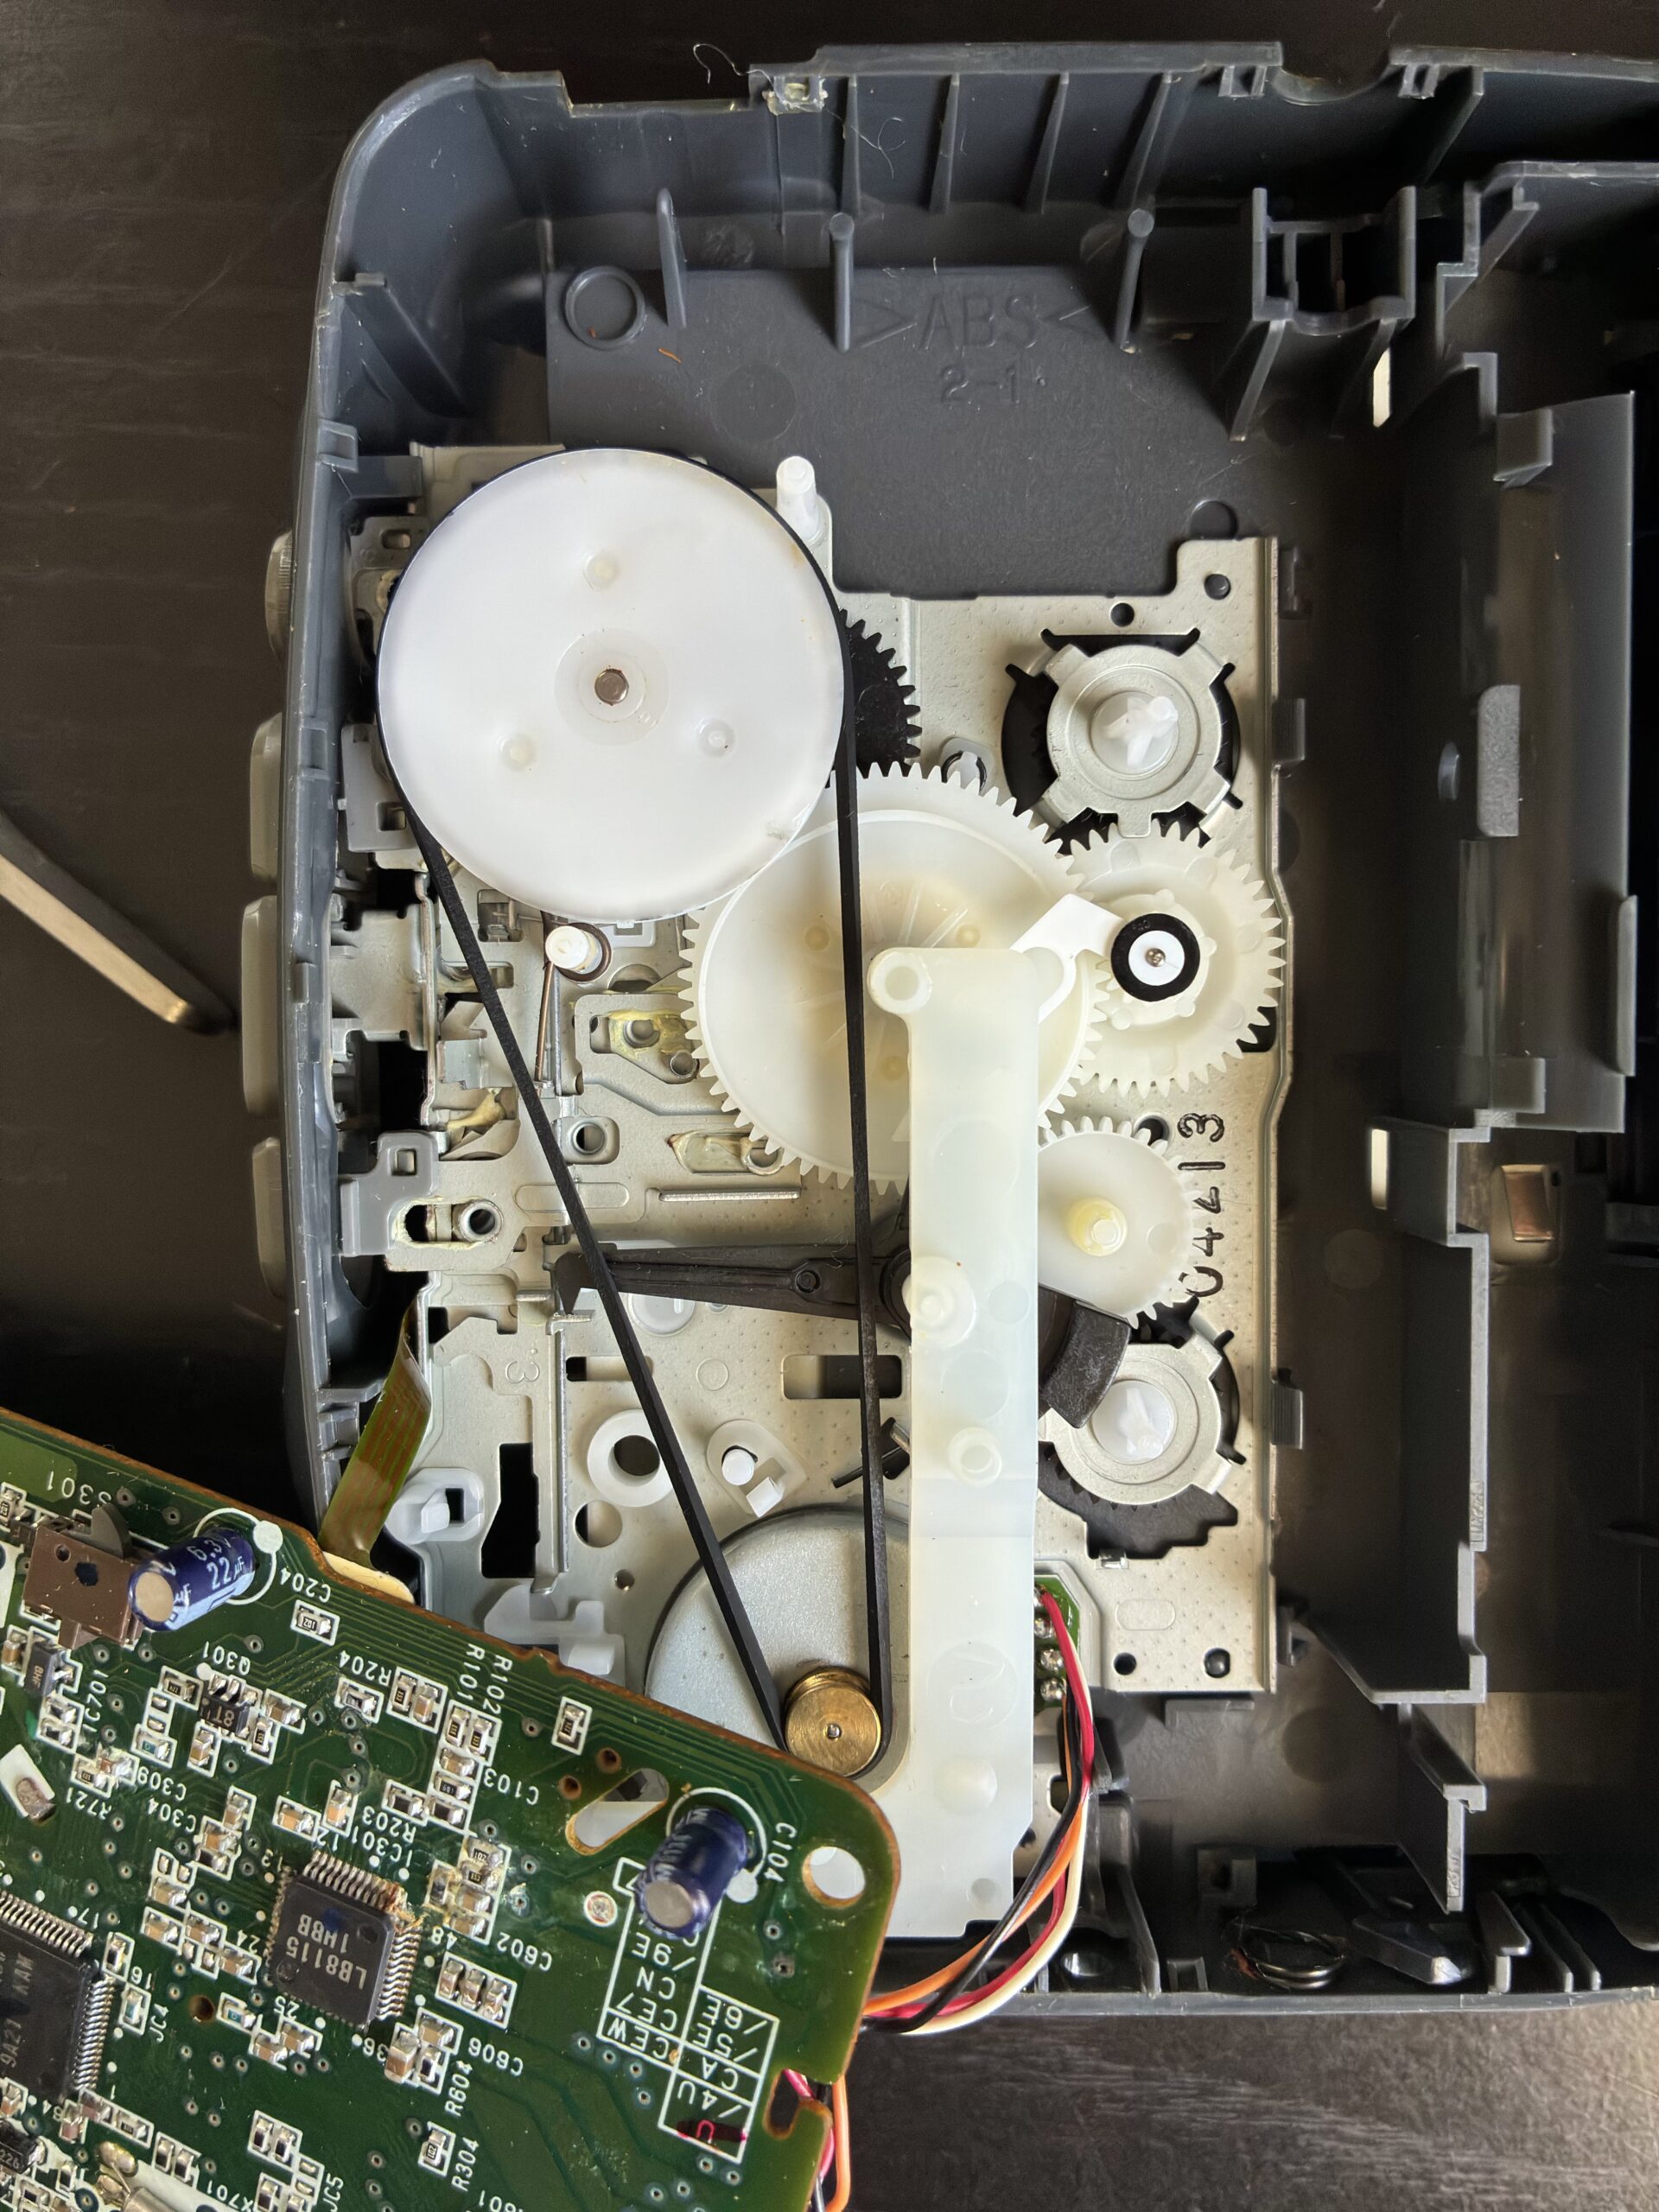
- Once the motherboard has been carefully flipped to the side, the old belt can be removed.
- The belt sits around the large, white gear and the small, gold gear as shown in Figure 4.
- Before installing the new belt, which can be readily found online, any residue from the old one should be removed with an electronics-safe cleaner, such as 90%-99% isopropyl alcohol.
Finishing Up
- Once the gears are clean, the new belt can be installed. (Note: multipacks of new rubber belts can be readily found and purchased online. The belt selected for this project should have some give and not be too tight when installed.)
- The device can now be tested by moving the motherboard to its original position, installing batteries, and placing the rubber control buttons from the face plate on top of the motherboard.
- If the player works, you’re all set! A few stop-and-play tests can ensure the belt stays in place before fully reassembling the device.
- If the player does NOT work, then there is a separate issue preventing it from functioning properly.
This simple repair can make a fun and productive project that gives your old device some new life. The best part? You can dust off and say “Hello, darlin'” to those old Conway Twitty tapes sitting in your grandparents’ attic. Or, take a trip to your local, physical music emporium and browse their selections. You might be surprised by what’s in store.